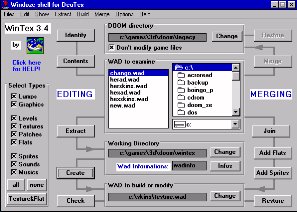
Part I: Creating the Skin FileUsing Wintex 3.4
By Mark Quinn
|
|
|
|
|
|
|
|
1.5 Building the .wad File
You should
now be in Wintexís main window. If not, just click ![]() to exit the editing window you are currently in.
to exit the editing window you are currently in.

At the bottom of the main window you will find a section marked WAD to build or modify.

Click ![]() .
Wintex will ask you to give it the name of your new .wad file. Select
the directory you want and type in the name you want for your file (8 characters),
then click
.
Wintex will ask you to give it the name of your new .wad file. Select
the directory you want and type in the name you want for your file (8 characters),
then click ![]() to return to the main window.
to return to the main window.

Click ![]() in the main window. Wintex will now build your .wad file. If
a file already exists by the name you have chosen, Wintex will prompt you
to make sure you donít accidentally delete a file you want to keep.
in the main window. Wintex will now build your .wad file. If
a file already exists by the name you have chosen, Wintex will prompt you
to make sure you donít accidentally delete a file you want to keep.
If everything has gone according to plan, you should now have a pwad containing all of your sprites, sounds (if any), statis bar graphics (if any), and your S_SKINxx lump.
So far. So good.
Unfortunately,
this file will not be able to work as a skin. This is due to the
way the file is arranged internally. Sadly, Wintex 3.4 is unable
to change this internal arrangement. In order to get our skin file
working, we must close Wintex 3.4, and finish our pwad using its newer
sibbling, Wintex 4.2.
| Adding the S_SKINxx Lump |
|
|
|
|